Saturday, October 26, 2013

Five Strand Dutch Braid

A complicated dutch braid


If you can do a dutch braid this will be much easier. Try and learn how to do that first.
The five strand braid looks so different and will definitely get peoples attention!
You can do this as a french braid, a normal braid or like this (dutch).
To make this look even more beautiful, tug on the edge of each outside stitch. This is also known as pancaking and makes your hair appear thicker and more luxurious. I have previously blogged about how a fishtail looks when it is pancaked ~ Pancaked Fishtails.


1. Brush out the hair and take the top section. Split it into five sections.
2. For the first stitch, cross the left-most strand under and over the next ones until you get to the last section.
3. Start from the left again.
4. On the rest of the stitches, add a layer of hair to the left-most section and then start weaving it through. When you get to the right-most section add a layer of hair on that side to the section.
5. Continue these steps until you get to the neck, then you continue braiding without adding hair.

To make this into a french braid version: cross the left-most section over and then under the rest of the sections.

Monday, October 21, 2013

Hair Care Routines

This is quite long so I apologise, scan through to find what parts relate to you and your hair.

I try to keep my hair as healthy as possible because I have seen how horrible damaged hair can look.
Here is how I keep it healthy:

Basically... Do Nothing

Now, this may sound silly. How can I  get my hair to be healthy without helping it?
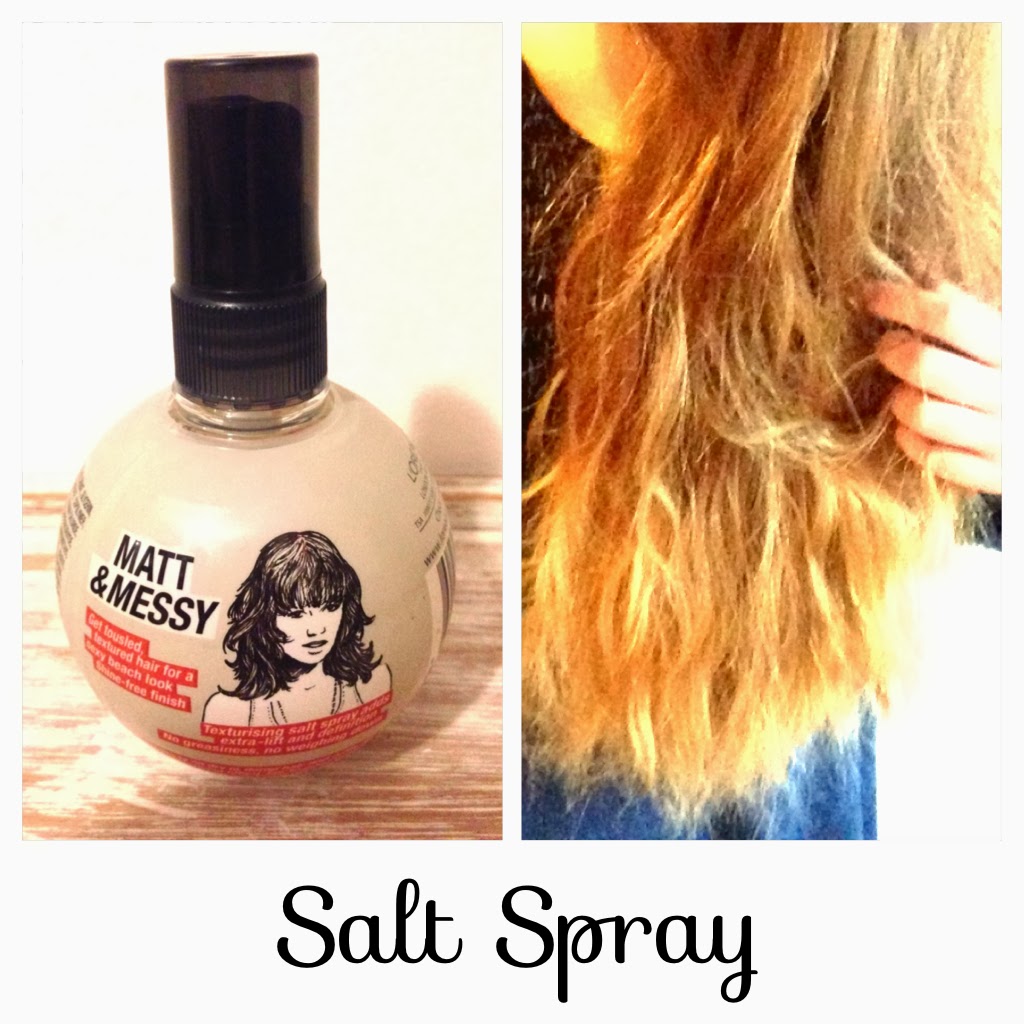
Using Heat:

But the only thing that ruins hair is doing too much stuff to it. Such as using heat on it.
Don't get me wrong, I love my hair after it has been blow dried and I curl and straighten my hair. Just not every day.

Let your hair dry naturally unless you have something you need to go to and don't want wet hair. But even then, try not to blow dry it totally bone dry. Stop the hair dryer when it is still ever so slightly damp. This way it won't dry it out as much.
Also, use a tiny bit of heat protectant on your hair before. Only a little bit as it may make it a bit greasy if you use too much.

Hate your natural hair?

If you hate you natural hair, don't use heat on it every day. This frazzles the hair so much and it is very hard to get it  back to what it was.

If you have straight hair like me, put it in dutch or french braids before you go to bed to create beautiful waves in the morning. And when this is the case, don't use too much hair spray on it to keep it wavy.
Some peoples hair hold curls better than others. Mine is useless when it comes to curling and falls out within hours. However, I know people that can curl their hair before bed and it is still in perfect curls two days later.

Naturally curly hair can be hard to manage as it gets knotted very easily. This is why when you got to bed brush it before and then put it in plaits. 
This isn't to make it wavy like for people with straight hair but to keep it tight and together so it can't spring out and tangle. This will make it much easier to brush in the morning.
If you want a way to sort out the curls you can straighten them. But this is going to dry out your hair and I think all curls are beautiful. I would do anything to have curly hair as it does look nice even when you haven't done anything to it.
Look for an anti-frizz spray in your local Boots or any hair shop. This will define the curls and stop them frizzing.
Instead of straightening with straighteners, after washing your hair blow dry it straight with a brush. I find this holds better than straighteners so you don't have to do it as often.

Washing your hair

DO NOT WASH YOUR HAIR EVERY DAY. You need the natural oils in your hair to keep it healthy. This doesn't mean you have to let it get greasy, just let it have a day of rest in between washing.
I would advise you not to wash your hair every other day either. This is better then everyday but it still takes any natural goodness our of hair before it can use it properly.
I know that every one has different hair types and that some gets greasier quicker than others but that is partially down to routine.
If you wash your hair every day it will get greasy in a very short time. The hair will be rushing to get natural oils on it to moisturize it and make it healthy.
Washing you hair twice a week or once is best. Obviously if you do a lot of work and get your hair sweaty then it is better to wash it.
Dry shampoo is great if your hair does get greasy quickly because it doesn't wash the goodness out, just absorbs the oil to make it less noticeable.
I suggest Batiste dry hair shampoo. It is the best I have used and smells amazing.

I am not a professional in all of this but I have taken this information from experience and observation.

Saturday, October 19, 2013

Mermaid Braids

An Autumn favourite


This braid is a little different because it isn't a french braid and makes the bottom of the braid thicker rather than it just being a regular three strand braid which is how a french braid ends.
I would wear this in the autumn because it takes bits from the front of the hair which is where you will have natural high lights from the summer.
It is good for the colder seasons because it keeps your neck warm and doesn't take too many layers off your head. Colder seasons are usually when it is most windy and because this takes hair from the front of the head they won't be flying around in the wind and getting in your eyes.


How to:

1. Take a small section of hair from the top of your head (not a whole layer, only a little bit).
2. Do one 'stitch' then add in a bit of hair taken right from the front of your head unless you are leaving you fringe out in which case take it from just behind your fringe.
3. Continue taking hair from the front on both sides. Do not pick up a whole layer because that will make it into a french braid which isn't what you want.

Thursday, October 17, 2013

Pancaked Fishtails

Make your fishtails look thick and voluminous 


I am obsessed with pancaking!
When I started this fishtail I planned it to just be a normal one but when I started pancaking a little, it turned into a lot!
Pancaking is when you pinch the edge of each stitch in the braid and tug at it gently. This pulls the braid apart which makes it wider, this give the impression you have thick hair.
For this style I used Mini Claw Clips to hold up the small pull back fishtails whilst I fishtailed the rest of the hair. I then took out the clip once the ends had been braided into the main fishtail.
The pancaking gives the style a relaxed look. This also creates soft, over night waves.
To help hold the waves and give an even better texture: add salt spray.


Waterfall Braid

A subtle bit of detail


This braid leaves the rest of your hair down to do what you want but adds detail and the look of effort to your hair.
This takes only 2 minutes and looks great if you have yesterdays curls left in.
From the front it looks like you have your hair simply clipped back but the back looks beautiful: great for holding your hair off your face or when you are trying to grow out a fringe.
I also find that it thins out the hair a lot because it takes the top layer up, great for in the summer and thick hair in general.
It works on any length hair which can be straight or curly.


1. Do one stitch of a regular 3 strand braid at the front of your hair.
2. Add a section of hair from the top of the head to replace the section you were crossing over the middle from the top. Drop this section and use the new one.
3. Add a tiny bit of hair from under the braid to flatten it down a little.
4. Continue adding and dropping hair until you get all the way around the the head.
5. Finish it off with a regular 3 strand braid.
6. Lift up a layer of the hair and clip this braid underneath so you can't see where the waterfall braid starts and ends.
7. Lightly brush over the hair to smooth it out.

Ribbon Braids

Add a bit more to your braids 


There are so many ways you can entwine ribbons into braids. You can add them into a section of the braid or replace a section of the braid with one entirely.
I think they look really girly and cute. This can even be done with a head scarf that was first wrapped around the head. Wearing it then into a braid would look unique and add an autumn style to any outfit.
You can do it with ribbons that match your outfit colour theme or for an event that has a particular colour logo.
I think this is a really good extra detail for spicing up your hair or bringing an outfit together.


When you replace sections with ribbons it can make patterns such as the example on the right. For that one did a six strand braid where I separated the hair into 4 sections then halved the ribbon to create two replacement sections. I had one on each side of the left most hair section and once I had done a few stitches with the ribbon it was perfectly secure.

For the left example:

1. Get the hair you are planning to braid, I went for a half up half down style.
2. Split the hair into two parts and fold the ribbon in half and hold it in between the hair parts.
3. Cross the right section over the left section so the ribbon falls half underneath and half over the hair.
4. Now cross the ribbons so the one on top is now underneath the braid and vise versa.
5. Repeat steps 3 and 4.
6. This braid is like doing two rope braids crossing over each other.

Show me what you came up with in the comments :)

Sunday, October 13, 2013

Rope Braids

Only two sections for this one


This elegant twist can be from a pony tail, entwined into another style, made into a french twist, twisted into a bun, or just as a side twist.
 I think it looks really pretty and different. It is simple and looks like a variation of a french braid.
The simplicity is what makes the style.


How to:

1. Tie your hair into a pony tail if that is how you want to start it.
2. Split the hair into two sections.
3. Twist them both in the same direction then wrap them around each other in the opposite direction. It has to be the opposite directions or it won't stay in a twist. 

For the style on the left simply start from the top and add in hair, make sure you twist the new bits of hair as well.

Salt Spray

Create soft and textured waves


I am loving this spray.
Salt Spray is currently one of my favourite hair products as it doesn't make the hair sticky or stiff, but still keeps the hair style secure.
Beach waves are what this product is aimed at and it definitely does it's job!
When you have heat less overnight waves in your hair, the best thing to keep it in but to still look soft and natural is definitely this spray.
If you like your hair so look a bit scruffy and messy then spray this before putting it in a messy bun or a simple pony tail and no hair spray and hardly any back combing is required. Back combing is not good for your hair as it breaks it and then makes it so knotty it is hard to brush out every night.
I used it on my natural hair and barely used any spray and only scrunched a little and it created very big waves but made it look so soft. I use it mainly to make my hair look soft rather than for the waves.


When you spray it use your hands to scrunch up the hair and release and repeat until you get your desired look.
I purchased this from the hair products isle in my local Boots and it was under £4. This is a great deal as it works great and lasts a long time.
It also smells delicious.

Mini Claw Clips

So useful for holding back shorter layers


These clips are literally my best friend. 
They are so useful for holding shorter layers when you are trying to braid, if you do this you won't get short tufts of hair spraying out from the side of the braid. I used it for this in the picture on the right.
You can also create styles just using the clips (such as the style on the right).
Another thing I use these grips for is around the edge of a messy bun. They look really pretty but also practical. Sometimes messy buns can get a little too messy and make it too loose to stay up. With these you can keep the messy effect but make it secure so it doesn't fall out.


The Mermaid Clip Back:

On the right side I was going to just use one clip to hold the short front bits from the face just like a pull back (link to previous Pretty Pull-Backs post)
However, I got a bit carried away and started to take more and more layers, creating a simple version of a mermaid braid, but with out the braid part!

Saturday, October 12, 2013

Cage Braids

Don't want to go as far as to have birds in your hair? Just have the cage instead


Spice up your simple pony tail with this braid. On the right side is the original cage braid but on the left I split the hair into two and only took from one side of the pony tail for each braid. They then fell together and made a lovely slightly more complicated braid then just one braid.


How to:

1. Put your hair into a secure high pony tail.
2. Take a small section of hair from the top of the pony tail and do one 'stitch' of a regular 3 strand braid.
3. Then start adding hair into each 'stitch' every time you cross one over. But when you get the hair to add, try and get it from under the ponytail so it does literally cage the hair left in the middle.
4. When you get to the end finish it with a regular 3 strand braid then tuck the end into the hair band under the pony tail.
5. Now, your braid should look like this:
6. It looks a bit lifeless. So to add the cage effect to it pinch the top of the ponytail and pull it forward, pin it down with lots of clips so it won't slip out and the braid should have splayed out more. Creating a beautiful effect. If you like you can pull out the added sections a bit more to make it even bigger.

Dutch Braids / Crown Braids

Create a more prominent braid than the french braid


If you can french braid you can do this no problem!
I love dutch braids as they aren't quite as casual as french braids but are still day to day wearable.
Glam it up a bit with some hair accessories. If you have thin hair pancake it out a little to make it appear thicker.
Pancaking is when you lightly pinch the edge of each 'stitch' of the braid and pull it out a little. You can pancake as much or as little as you like and it also flattens the braid a little so it is good if you know you are going to be putting a hat or helmet on during the day. 


For the style on the left:

Crown Braid:

1. Start at the top of the hair, take a section and separate it into 3 parts. Instead of braiding by crossing the edge section over the middle section, cross them under the middle.
2. For every 'stitch', add some hair from the front of the head on one side. 
3. Once you get to behind the ear, start adding bits of hair from the center of the head as well as from the edge. 
4. When you have gone all the way around the head finish of braiding with a normal three strand braid.
5. Tie this off with a small elastic and tuck it under the beginning of the braid. Make sure to use a good amount of clips to keep it succure.
6. Pancake as much as you want. Finished :)


Thursday, October 10, 2013

Six Strand Braid

So many strands! Where to begin?


3 strands aren't enough? Why not double that to 6! This six strand braid looks so complicated but you will soon get the hang of it. 
Do this starting from a pony tail to make it even more striking.
Add some ribbons into the hair and tie it in a bow at the end of the braid.


How To:

This is quite complicated but simple when you know how so it may help to also look at a tutorial on youtube, I suggest Luxy Hair youtube channel (link in my side bar).

1. Split the hair into six parts (easiest way is in half then into three parts each)
2. Start on the right side with three parts, cross the rightmost strand over the one next to it and then the middle strand over what was previously the rightmost strand.
3. Get other person you are doing this braid on to hold these strands so you can move onto the other side.
4. On the left side, cross the left most strand under the one next to it and the middle strand under the previous left most strand.
5. Cross what was the left most strand under what was the right most strand (cross over the two middle strands)
6. Now repeat until you run out of hair.

I know this is complicated and if you are doing it on your self you will have to practice not dropping sections.
I have tried to explain this as well as possible but maybe read it a few times to make sense.


Tuesday, October 08, 2013

Pretty Pull-Backs

When your hair just won't cooperate, go for the half up half down style.


But why stop there? Why not make it even prettier and add some extra detail?
This simple hair style can be transformed into beautiful, intricate, patterns. Wear it out and you will certainly get compliments! 
Style the front however you like and curl the bottom layer of hair to make it even more elegant.
 I love this hair style as it takes the hair off my face but leaves it down to fall naturally or curly at the back. There are so many ways of wearing your hair like this, experiment to find your favourite one.


For the up-do on the left:
Heart Braid
1. Section off the top layer and tie the rest of the hair with a hair band.
2. Split the top layer in half and three strand braid each one.
3. Twist each braid inwards and pin them in place so the ends point down.
4. Tie the ends together with a see-through elastic or a decorative hair band.

Monday, October 07, 2013

Fishtails For All

This is my first post so I thought I'd keep it simple; fishtails are in! 


I am seeing fishtails everywhere, they started off as a luxury hairstyle but are now becoming more common as people realize just how easy they are to do. 
You can wear them in so many different ways or simply as a casual side braid. Keep them neat and tidy or pancake them out to make them messy and thick (this is especially good if you have thin hair that usually lays there looking limp). I personally like to intertwine them into other hairstyles as a little added detail. For example: wrapped around a bun or two on either side of you face.
As you can see, I have french braided the fishtail on the left to make sure it holds back any shorter layers at the front of the hair and to make it more interesting then starting at the neck. 
On the right side I separated the hair into three equal sections and individually fishtailed each one. Then with these I braided them together into a three strand braid.  


How to fishtail:

1. Split the hair into two sections.
2. Take a small section from the outside edge of one of the sections and cross it over and add it to the inside edge of the other section. This is now part of this side.
3. Take a small section fromt the other side and cross it over and add it into the other section. 
4. Repeat until you run out of hair.